







JotClipart For teachers

Free for teachers No account needed

Clipart for your classroom

Find pictures for your lessons and turn them into worksheets, presentations, labels, and visual instructions.

Choose a material below for the steps and tools you need.

Free for personal and educational use. View the license

Examples from the library Open an illustration to explore it

Explore geography, reading, technology and other subjects for your teaching.

Free for teachers

Artwork downloads, the studio, Favorites boards, and the print size calculator are free for personal and educational use. No account needed.

See the personal and educational license.

Explore free artwork

How to use JotClipart for teaching

Bring an illustration into the material you already use, or build the layout in the studio.

  1. 1 Find artwork

    Browse a subject, open an artwork page and check the image, background and file details.

    Browse the library
  2. 2 Adapt the layout

    Add instructions in your document or presentation, or use the studio for text, shapes and layout.

    Open the free studio
  3. 3 Download your file

    Download an image for a compatible app or a PDF for printing. Check the finished file before using it in class.

    Follow the download steps
  4. 4 Save for next time

    Collect artwork in named boards. Save the editable project and a board backup for later.

    Open free Favorites boards

What are you preparing?

Choose a task for practical steps, artwork suggestions and ways to adapt the material.

Prepare a worksheet or handout

Start with the question and the space students need to respond. Add illustrations where they help explain or complete the task.

  1. Set the task

    Write one clear instruction. Decide whether students will label, compare, explain, sort or draw, then reserve enough answer space.

  2. Choose the illustration

    Browse a subject and open the artwork page. Check the image dimensions and background, then choose Download Image.

  3. Build the page

    Place the image in a compatible document app, or arrange it with text in the studio. Keep the instructions as editable text in your source document.

  4. Check a printed copy

    Confirm the paper size, margins and image size. Read the smallest text on one printed copy before printing copies for the class.

Adapt for your class

Offer a word bank, fewer items or a larger answer area. Keep the same learning goal while changing the amount of reading or writing required.

Make a clear teaching slide

Use an illustration to introduce a question, explain an idea or model an example. Give the important detail enough room on screen.

  1. Choose what to show

    Choose a picture that helps explain the idea. Leave enough space for the heading and labels.

  2. Download the image

    Choose Download Image on the artwork page, then save the file from the download window on the same page. Check that your presentation app supports WebP.

  3. Add the explanation

    Add a short heading and labels as real text in your presentation. Use your app’s alternative-text field to describe the information the image adds.

  4. View it as students will

    View the slide in full-screen mode. Check the contrast, text size, and image details from the back of the room.

Adapt for your class

Reveal one step at a time, provide the explanation in writing, or give students a separate enlarged image when needed.

Label a space, tray or folder

Make the words easy to recognize and keep the picture consistent across a set. Use the same approach for subject folders and classroom displays.

  1. Decide the wording

    Choose a brief label, such as Reading corner or Paper scraps, and measure where it will go.

  2. Open a starting point

    Open Create and scroll to the starters. Choose Learning label or start with a blank canvas. Save your current work before choosing a new starter.

  3. Arrange words and artwork

    Add your caption with Text and select objects in Layers. Leave clear space around the words; remove decoration that crowds them.

  4. Save both versions

    Choose Save project to keep an editable copy. Export an image or PDF, then check the printed size against the tray or folder.

Adapt for your class

Pair a clear word with a relevant image. Keep the layout consistent, and change the language or text size for the class using it.

Show a routine or sequence

Break a familiar classroom process into a few visible steps. Use the pictures alongside spoken or written instructions.

  1. Write the sequence first

    List what students should do in order. Keep each instruction short and choose only the steps the class needs.

  2. Choose recognizable pictures

    Find illustrations that relate to each action or object. Check the meaning with your students rather than assuming a picture explains itself.

  3. Number and label the steps

    Use the studio or your document app to place pictures beside numbers and words. Keep the text and image positions consistent.

  4. Introduce it in class

    Explain and model the routine, then place the finished sequence where students will use it. Revise any confusing wording or picture.

Adapt for your class

Use fewer steps, larger spacing or a separate card for each step. Offer a written or spoken explanation alongside the visual version.

Start a discussion or writing task

Give students something specific to observe, describe or question. The same illustration can support different subjects and levels of response.

  1. Choose the focus

    Decide whether students will describe what they see, explain a choice, compare details or imagine what might happen next.

  2. Select the picture

    Choose a setting, object or scene that supports the focus. Use an image that leaves room for the question and response.

  3. Add a useful prompt

    Try “What do you notice?” followed by a subject-specific question. Supply vocabulary or sentence starters if the task needs them.

  4. Choose a response

    Invite spoken, written or drawn responses as appropriate to the lesson. Keep an editable copy so you can change the prompt for another class.

Adapt for your class

Offer a word bank or sentence starter for support. For a further challenge, ask students to compare details or explain their answer.

Organize a reusable teaching set

Keep your chosen artwork together and save the editable material separately. A board can collect images for a topic, class or term.

  1. Collect the artwork

    Use the heart button on artwork you want to keep. Open Favorites to see the collection saved in this browser.

  2. Name the board

    Create a board with a clear name, such as Geography: maps or Term 2: reading. Choose Organize on a saved illustration to add it to a board.

  3. Keep an editable source

    Choose Save project in the studio to download an editable copy. Give each version a clear filename so you can find and adapt it later.

  4. Make a backup

    Use Export backup in Favorites and keep the downloaded file. Boards are stored in the current browser; a backup lets you restore them elsewhere.

Adapt for your class

Keep a common source project, then save separate versions with different wording, spacing or support. Update the finished export after each change.

Classroom examples

Three layout ideas using real catalog artwork. Open the illustration to build your own version.

Geography · observation What do you notice?
A blue Earth globe centers the Atlantic between the Americas and Africa.

Name two things you can see.

Name: __________________

Worksheet

Pair an image with a specific question and leave a useful response area. Add a word bank when students need one.

Use the Earth illustration
A boy in a red hoodie and a girl with a green hair bow read together. Reading corner Choose a book. Find a place to read.

Classroom label

Use a familiar picture, a short title and consistent spacing. Check that the words are readable where the label will go.

Make a label step by step
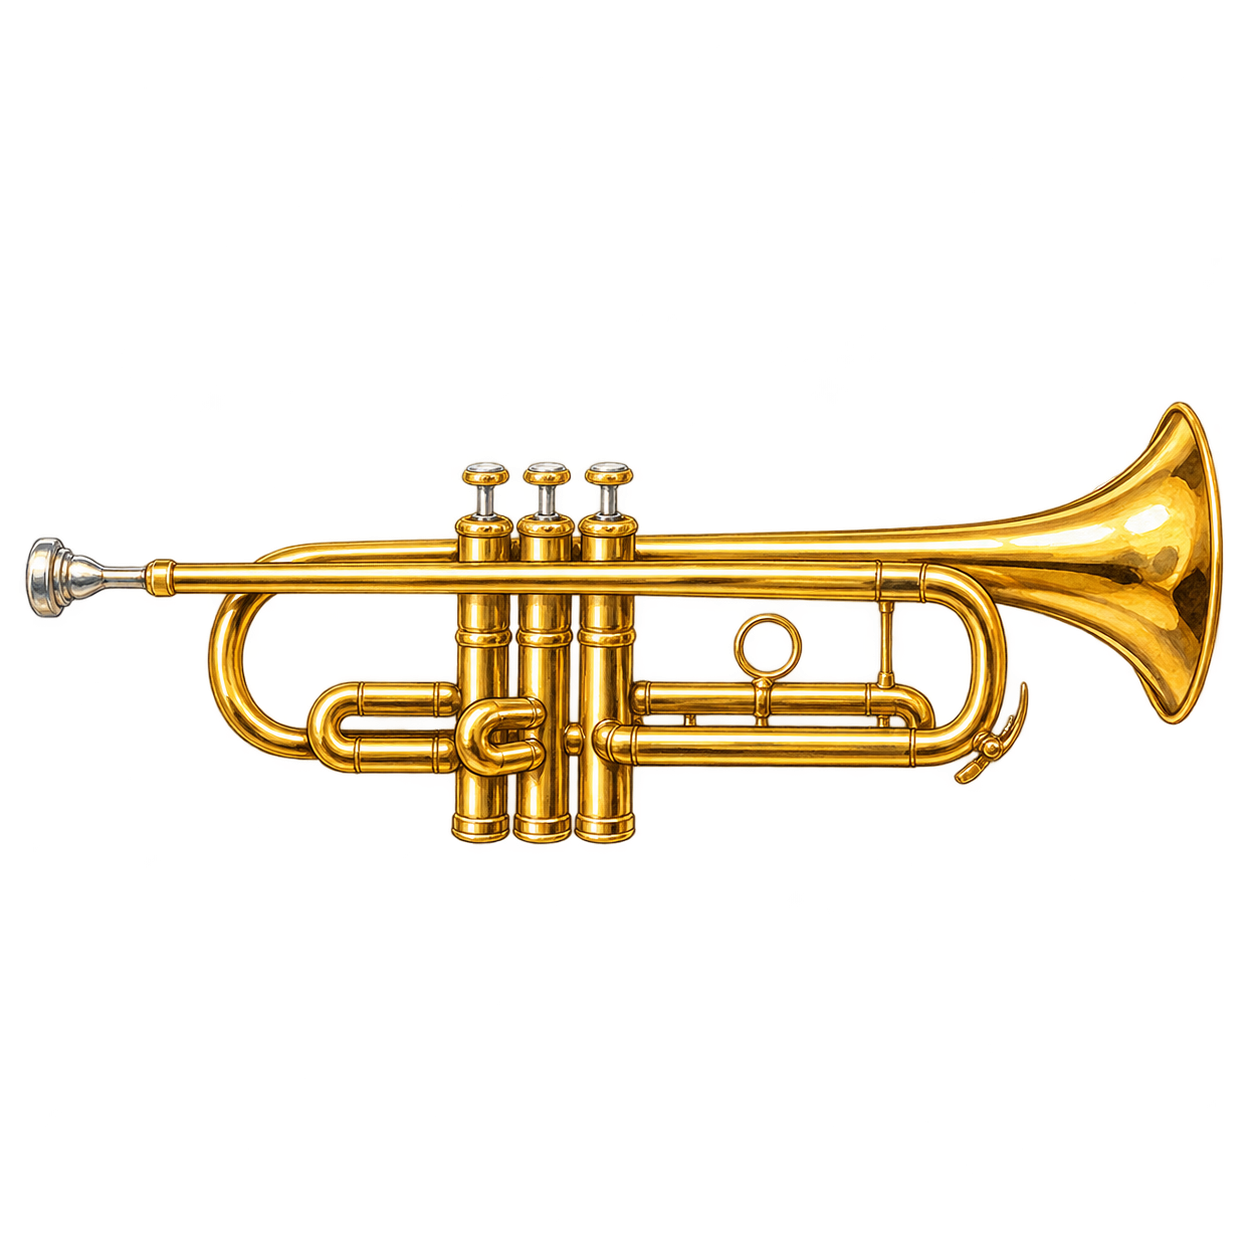
Music · discussion Describe the sound

What words would you use?

A small trumpet lies horizontally with three valves above its curved tubing.

Teaching slide

Give the image and prompt enough room. Keep your written explanation in the presentation so you can adapt it later.

Open the trumpet artwork

Find artwork for your subject

These are starting points. Browse the full library for the topic and style your lesson needs.

All subjects

See where to click

Select a number on the screenshot to see the instructions for that control.

All walkthroughs

Add your wording and arrange the page

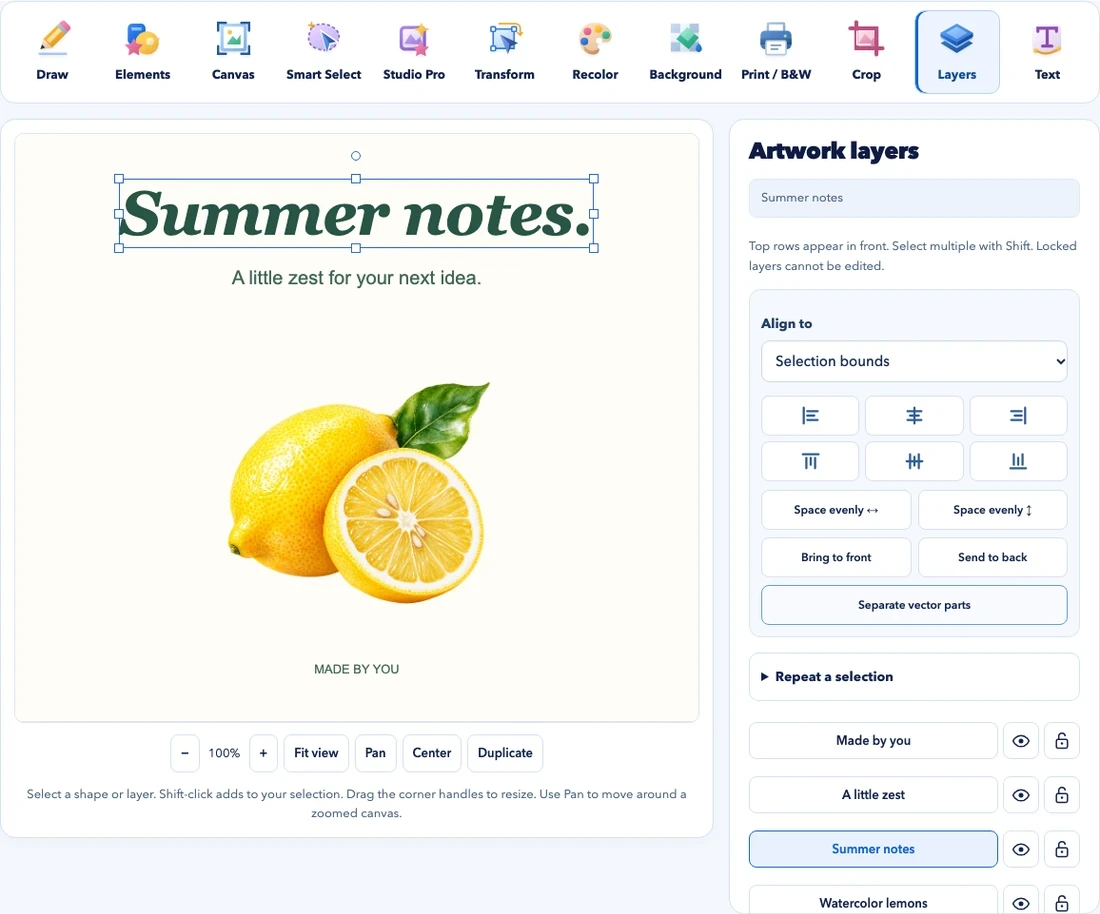
Actual studio example with a realistic lemon illustration, a selected Summer notes caption, the Text tool and the Layers panel.
The studio with a sample design. Use these controls to add text and arrange artwork for any subject. View full screenshot
  1. Open Text, type your wording and choose Add / update caption. Keep the instruction short and leave room for students to work.

  2. Select a named row to work with that object. Imported clipart may be one image layer; text you add in the studio remains a separate editable layer in the project.

  3. Move or resize the selected object while keeping its proportions. Choose Save project to keep an editable copy, then export the finished image or PDF.

How to organize a teaching board

Keep a board for a lesson or topic

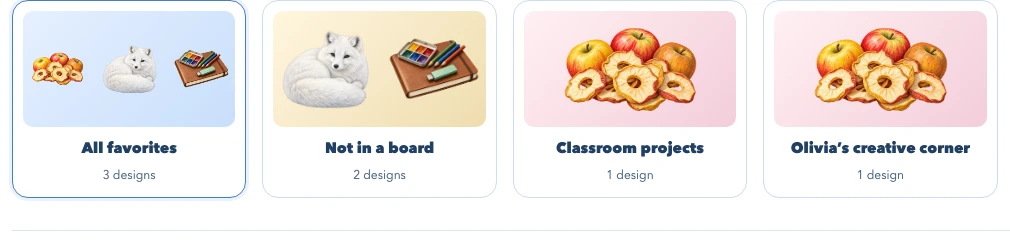
Actual Favorites interface with sample All favorites, Not in a board, Classroom projects and another named board.
Favorites with sample boards. Give your own boards names that match your lessons or projects. View full screenshot
  1. Choose a board to see its saved illustrations. All favorites shows everything. To start a new collection, use Create board in Favorites and give it a name you will recognize.

Check your material

Check the material at the size and in the format your students will actually use.

Preparation checklist

Five things to check

Ticks stay on this page until you refresh. Use Print to keep your selected steps and this checklist.

For a printed page

Check pixel dimensions with the print size calculator. For PDF, confirm the page size and print scale in your PDF reader. Print one copy to check margins and small details.

Check print dimensions

For a screen or document

Keep instructions as real text in your document or presentation. Describe meaningful images using your app’s alternative-text feature and explain the task in more than one way.

Choose the right file

For next term

Choose Save project to keep an editable studio file. Export a separate image or PDF for use in class. In Favorites, choose Export backup to keep a separate copy of your boards.

Open your teaching boards
Further reading on clear, accessible materials

Guidance on choosing, explaining and adapting images for your students.

Practical questions

Can I use the artwork in teaching materials?

JotClipart catalog artwork and starters are free for personal and educational use. This includes classroom worksheets and student assignments. Commercial use and resale are not permitted. Edited versions keep the same restrictions. Read the full license for the scope of permission.

Which file should I download?

Choose Download Image to get a WebP image for a compatible document or presentation app. Choose Download PDF for the printable document and check its page size on the artwork page. In the studio, choose Save project to keep an editable version. See the download steps.

Can every detail inside an illustration be edited?

Many catalog illustrations open as one image layer. You can arrange the image and add separate text or shapes, while details painted inside the image remain part of that layer. The studio’s layered starters have separate editable shapes. See how layers work.

Are boards and projects synchronized between devices?

Favorites and studio recovery are stored in the current browser. Choose Export backup for your boards and Save project for your design, then keep the downloaded files. You can restore a board backup or reopen a saved project on another device.

Does an export automatically make an accessible document?

A finished image is flattened. Keep real text, image descriptions and a logical reading order in your source document or presentation. Check PDF accessibility in your authoring app; exporting alone does not establish that a PDF is accessible.